



About
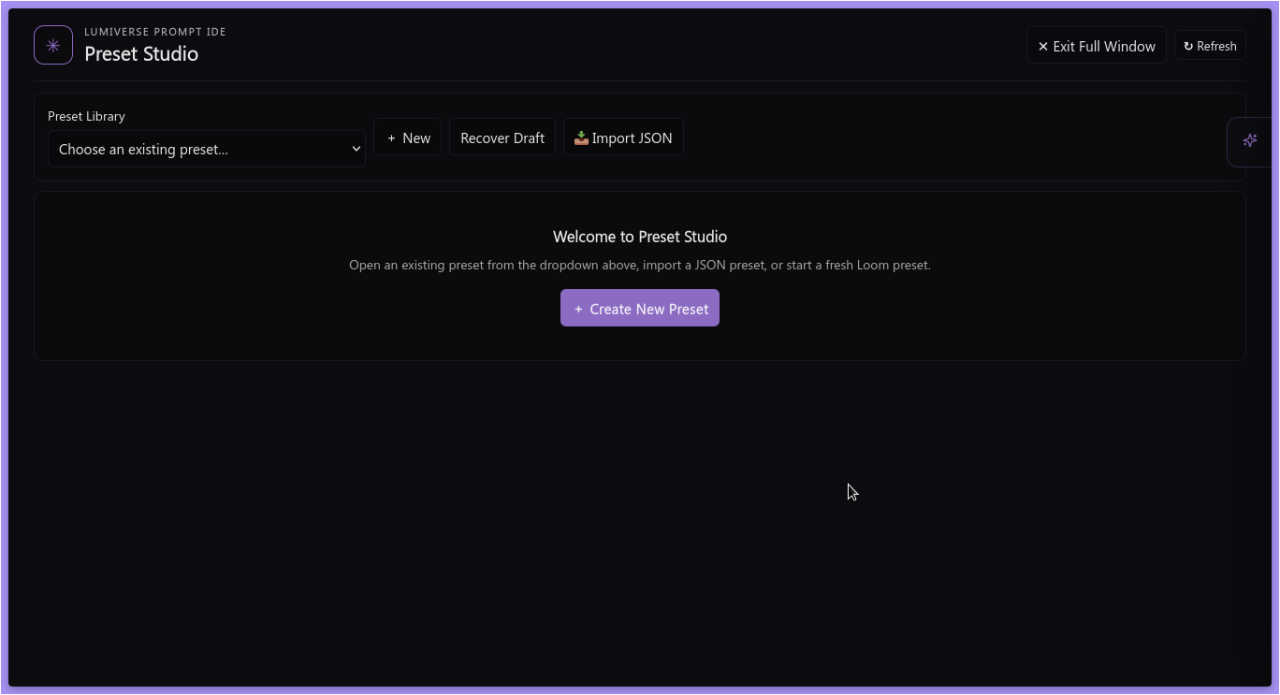
Preset Studio is a visual workspace and Prompt IDE extension for Lumiverse. It lets you create, organize, remix, translate, and test AI presets in a clean full-window or sidebar studio—without needing to edit raw JSON or guess what the AI is actually seeing.
This guide is written so that complete beginners and advanced preset creators alike can understand how presets work and use every feature with confidence.
Permissions
4 permissions
Read, create, change and delete your presets.
Run text generations for you and see your connection profiles.
Read, change and delete your chats.
What it adds
4 additions
- 2
Preset Studio: Open Full Window
Preset Studio: Test Active Chat Prompt
- 2
Drawer tab: Preset Studio
App mount
Version and source
1 detail · 1 link
Details
1.1.0
Links
🧠 Preset Studio
🛠️ Tour of Preset Studio (All 6 Tabs)
You can open Preset Studio from the Studio tab in the Lumiverse sidebar drawer,
from the ✳ Open in Preset Studio button inside Lumiverse's native Preset Editor,
or by pressing Ctrl+K / Cmd+K and selecting Preset Studio: Open Full Window.
Top Command Bar
Preset Library: Open any existing preset from your Lumiverse library.
+ New: Start a fresh Loom preset with sensible default blocks.
Recover Draft: Preset Studio auto-saves your draft every half-second. Click
this if you ever close the browser before saving.📥 Import JSON / 📤 Export JSON: Import or export .json preset files for
backups or sharing.↶ Undo / ↷ Redo: Step backward or forward through your recent changes
(Ctrl+Z / Ctrl+Shift+Z).Save Copy / Save Changes: Saves your draft directly into Lumiverse and syncs
live with the native Presets drawer.
Tab 01 — Prompt Architect
Build and organize your prompt blocks:
Reorder Blocks: Drag any block using its ⠿ grip handle (supports both mouse
and mobile touch) or click the ↑ / ↓ buttons on the row.Enable / Disable (On / Off): Toggle blocks on or off with one click.
Disabled (Off) blocks are dimmed and skipped during generation.Delete Blocks (🗑): Click 🗑 on any row to remove a block, or check multiple
blocks on the left and click 🗑 Delete Checked in the toolbar.Add Templates (📦 + Add Template): Opens a modal picker to insert a saved
bundle of blocks right after your currently selected block.Native Loom Editor Mode (⇄ Native Loom Editor): Switch anytime between the
Studio Power Inspector and Lumiverse's built-in React block editor.Block Inspector Controls (Right Pane):
Role: Choose system (instructions), user, assistant (prefills/examples),
user_append, or assistant_append.Position & Depth: Place blocks Before Chat History (pre_history), After
Chat History (post_history), or At Depth in History (in_history) (e.g.,
Depth 2 injects the block 2 messages from the end of the chat).Injection Triggers: Leave empty to run on every reply, or restrict a
block to specific actions (normal, continue, regenerate, swipe,
impersonate, quiet).Insert Macro Bar: Pick common macros ({{char}}, {{user}}, {{persona}},
{{if::...}}, {{memories}}) and insert them directly at your cursor.⤢ Full-Screen Editor: Opens Lumiverse's native full-screen editor with
{{macro}} syntax highlighting.⚡ Macro Preview: Preview how a block's {{macros}} resolve against your
selected chat without modifying chat state.🔧 Fix Blocks in Draft (Auto-Detector): If you import blocks from modular
presets that store text inside {{setvar::...}} variables without a
matching {{getvar::...}} output block, Preset Studio detects them and
lets you fix them in one click.
Tab 02 — Variables & Inputs
Create user-friendly settings menus (Sliders, Dropdowns, Switches, Text inputs)
for your preset without touching raw JSON:
Select a block in Tab 01 and switch to 02 Variables & Inputs.
Click + Add Variable and set an Internal ID (e.g., writing_tone), Display
Label, Input Type, and Default Value.For Dropdown variables, you can optionally enable Placement Selector so each
dropdown choice dynamically changes the block's Role, Position, and Depth.Reference the variable anywhere in your prompt text using
{{var::writing_tone}}.
Tab 03 — Samplers & Behavior
Fine-tune how the AI generates responses:
Visual Sampler Sliders:
Temperature (0.00 – 2.00): Lower (0.5–0.7) is focused and logical;
medium (0.8–1.0) is balanced for creative storytelling; higher (1.2+) is
highly unpredictable.Top-P / Min-P / Top-K: Controls how the AI filters unlikely word choices
(Top-P: 0.95 or Min-P: 0.05 are great starting points).Frequency / Presence / Repetition Penalties: Reduces repeated phrases
(supported mainly on OpenAI-compatible APIs).Max Response Tokens: Maximum length of one AI reply (~400–800 for
standard turns, or 2000–4000+ for reasoning/thinking models so they
don't run out of tokens while thinking).Utility Prompts: Set defaults for Assistant Prefill (Start Reply With),
Prompt Bias, Continue Nudge, Impersonation Prompt, and Author's Note.Context Filters: Strip HTML formatting,
blocks, or <loom> tags
from older messages beyond a chosen Keep Depth to save context tokens in
long chats.Sovereign Hand Co-Pilot: One-click button to insert a conditional
{{loomSovHand}} director-mode block.
Tab 04: Remix & Templates (Steal the Best Parts of Any Preset!)
Love the writing style from Preset A and the NPC rules from Preset B?
Open 04 Remix & Templates and pick a preset under Inspect Source Preset.
Use ▸ Collapse All to Titles to scan large presets quickly, or click ▸ on
any block to read its prompt.Click + Add to Draft on any block to drop it straight into your current
preset.Or check multiple blocks, click Add Checked Blocks to Template Basket, give
it a name, and click Save Template. Now you can insert that bundle into any
future preset in 1 click!
Tab 05 — Test Lab & X-Ray
Preview the exact assembled prompt and run safe test generations without
polluting your real chat history:
Select a Context Chat, Connection Profile, and Generation Type.
(Optional) Enter an Optional Custom Test Turn to test how the AI responds to
a specific user message.Click 🔬 Preview Draft Prompt (instant, uses 0 API tokens) or ▶ Generate Test
Reply (streams a live reply and <think> reasoning).Inspect 🔬 Prompt X-Ray & Assembled Messages:
📋 Complete Prompt Architect Block Audit: Shows every single block from
Tab 01 and whether it was ✅ Sent, ⏸ Off, 📁 Category, or ⚪ Empty/Skipped
(with the exact reason why).📨 Final Messages Sent to AI Provider: Displays the exact { role, content
} message array sent to the model after all macros and variables are
expanded.A/B Session Run Comparator: Compare any two test generations
side-by-side to see how prompt edits or sampler changes affect the AI's
output.
Tab 06 — Translation & Studio
Translate individual blocks, selected batches, or entire presets into any
language:
Automatically shields all {{macros}} (including nested macros) before
sending text to the translation model and verifies that every macro is
intact before restoring it.Provides a side-by-side Original vs. Translated review panel before applying
changes to your draft.
❓ 4. Beginner Troubleshooting & FAQ
Q: Why does a block show ⚪ Empty/Skipped in the Test Lab Audit even though it is
turned On?
Empty Character Field: If the block is a marker like Scenario or Char
Personality and the character card in your selected test chat has nothing
written in its Scenario or Personality field, Lumiverse skips the empty
block.False Conditional ({{if::...}}): If a block is wrapped in
{{if::{{isGroupChat}}}}...{{/if}} and you are testing in a solo chat, the
condition is false and outputs nothing.Modular {{setvar}} Block: Some advanced presets store text inside
{{setvar::name::...}} variables and rely on another block to call
{{getvar::name}}. Click 🔧 Fix Blocks in Draft in Tab 01 (or run a test in
Tab 05, which handles unread setvar blocks automatically).
Q: Why are a block's fields greyed out in Tab 01?
The block is Locked (🔒) to prevent accidental edits. Click 🔒 Locked (Click
to Unlock) at the top right of the Block Inspector to edit it. (You can
still delete or reorder locked blocks anytime.)
Q: Where do I grant permissions if a feature says a permission is missing?
Open Lumiverse Settings → Extensions → Preset Studio and ensure presets,
chats, generation, and app_manipulation are enabled.